Identify the configuration before comparing sizes
Two genuine references illustrate why size alone is an incomplete description. Rolex reference 126200 is a 36 mm Datejust with a domed bezel; the silver-dial configuration 126200-0001 has a Jubilee bracelet. Reference 126334 is a 41 mm Datejust with a fluted white-gold bezel; the blue-dial configuration 126334-0001 has an Oyster bracelet. A comparison between these two configurations changes the diameter, dial, bezel and bracelet together.
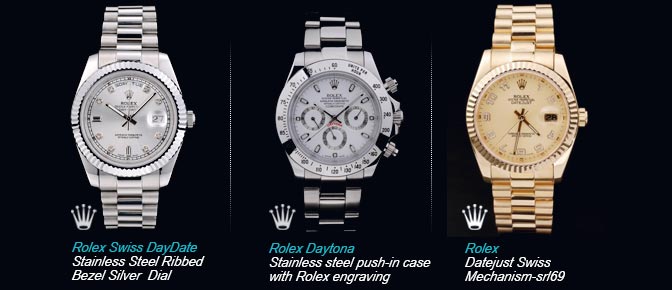
Use those references to name the intended design, then record the actual replica's size and supplied configuration separately. The right-hand watch in the site's original three-watch photograph is a Datejust appearance example. That single image cannot compare two sizes or establish the metal in a gold-coloured finish.
36 versus 41: compare the footprint, not a wrist-size rule
Start with the same dial, bezel profile and bracelet where possible. The 36 label is the smaller design direction; the 41 label gives the dial more presence. Neither label tells you the actual lug span, thickness or minimum bracelet length of the replica. A watch you already wear comfortably provides a better baseline than an isolated close-up.
| Priority | 36 direction | 41 direction | Deciding evidence |
|---|---|---|---|
| A quieter wrist presence | Start here if you prefer a smaller case footprint. | Keep on the shortlist if the dial presence is the attraction. | Top-down views at the same camera distance; actual diameter without crown. |
| Reading the date and dial | Check that the chosen dial furniture leaves the hands easy to follow. | A larger design does not automatically improve contrast or date magnification. | Both dials in the same indoor light, at normal reading distance. |
| Case staying within the wrist | Check the ends of the lugs and rigid end links. | Pay particular attention to any overhang rather than diameter alone. | Actual lug-to-lug and rigid end-link span, with wrist circumference recorded. |
| Bracelet and cuff fit | Confirm the shortest usable bracelet arrangement. | Confirm thickness and how the clasp sits after sizing. | Thickness, removable links, clasp positions and a side view. |
A practical shortlist reads: candidate A, measured case diameter, thickness, rigid span, shortest bracelet length; candidate B, the same fields. Leave an unprovided measurement unknown. Do not turn a nominal 36 or 41 designation into a universal gender or wrist-circumference recommendation.
Choose a plain or fluted bezel, then a bracelet
| Detail | Visual effect | Useful comparison |
|---|---|---|
| Plain, smooth or domed bezel | A continuous reflective border keeps attention on the dial. | Retailers may group smooth and domed together; match the actual curvature to the intended reference. |
| Fluted bezel | Repeated facets create a more patterned, light-catching frame. | Compare facet regularity and profile under a tilted view. The shape alone does not identify the metal. |
| Jubilee-style bracelet | The five-piece pattern adds detail around the wrist. | Compare the small-link articulation, gaps between links and the adjustment that actually works. |
| Oyster-style bracelet | The three-piece pattern gives a broader, simpler link appearance. | Compare end-link fit, clasp closure and the remaining adjustment after sizing. |
For a restrained configuration, begin with a plain bezel and Oyster-style bracelet. For a more decorative combination, compare a fluted bezel with Jubilee-style links. Mixing a plain bezel with Jubilee-style links puts the pattern in the bracelet rather than around the dial. These are styling choices; the supplied parts and finish still determine how a particular watch looks and wears.
If the full weekday display is part of the appeal, compare the Day-Date's calendar and President-style bracelet. If you prefer a clear three-hand dial without a date lens, the Oyster Perpetual guide offers a more relevant alternative.
Separate date printing, wheel alignment and lens position
Inspect the date after it has fully settled, with the camera square to the dial. Compare several positions on the same wheel, for example 1, 8, 15, 22 and 28. This is a sampling method, not a claim that these five positions certify the entire mechanism.
| Observation | Possible finding | Next step |
|---|---|---|
| Several dates in straight-on views | All appear displaced in the same direction, or only one printed number sits differently. | Record each date separately; distinguish consistent wheel/window alignment from an individual printing issue. |
| Straight-on and tilted lens views | The apparent position changes with camera angle. | Return to the straight-on view before attributing an optical effect to the date wheel. |
| Date after normal midnight change | The number settles fully, remains between positions or has not been shown. | Record the outcome and elapsed transition, with unshown operation marked unknown. |
| Crown-setting demonstration | The actual quick-setting behaviour matches or differs from the listing. | Identify the installed mechanism before using any setting instructions. |
The movement-label guide explains why a copied calibre number is insufficient to identify the date mechanism. Transfer the observations and supplied configuration to the inspection record so a different bracelet or an unshown date function does not disappear from the comparison.
The final Datejust choice
Choose the candidate whose measured footprint fits, whose bezel and bracelet produce the appearance you want, and whose date evidence is clear. A fluted shape is not a precious-metal test, and a larger diameter is not a substitute for legibility. If the two candidates differ in all three styling elements, decide which complete configuration you prefer rather than attributing the result to size alone.